Authentication in Node.js
In this article we will be learning how to perform authentication in Node.js using JWT.
Authentication is a process of identification of user’s/device identity. A common example of this is entering a username/email and password when a user is trying to login. The authentication process starts when a user’s/device credentials are correct. You must have already familiar with authentication because we all do this in our daily routine.
What is JWT
JSON Web Token (JWT) is an open standard (RFC 7519) that defines a compact and self-contained way for securely transmitting information between parties as a JSON object. This information can be verified and trusted because it is digitally signed. JWTs can be signed using a secret (with the HMAC algorithm) or a public/private key pair using RSA or ECDSA.
Prerequisites
To follow along with this tutorial, you will need:
- A working knowledge of JavaScript.
- A good understanding of Node.js.
- A basic understanding of MySql or any database of your choice.
- Postman and some knowledge on how to use Postman.
Creating our backend server
To get started, we’ll need to set up our project.
First make a project folder called “auth”. You can name whatever you like but here just to indicate that we are authenticating so we are naming the folder “auth”.
Now, open Visual Studio Code by navigating to a directory of your choice on your machine and opening it on the terminal.
Now navigate your folder in visual studio and open the whole folder. Once you are done with it, open Visual Studio Code terminal. It should already be on the current folder location. Now type “NPM init -y” on the terminal. Now you will be able to see a file called “package.json”.
Now open the explorer menu, click on new file icon and name your file as “server.js”.
Next, go to your terminal and install dependencies using this terminal command.
npm install express jsonwebtoken dotenv nodemon bcryptjs mysqlOnce everything is installed lets initialize it and run our server using app.listen command on port 5000.
const express = require(“express”);const app = express();const bodyParser = require(“body-parser”);app.use(express.json());app.use(bodyParser.urlencoded({extended: true}));app.listen(5000, ()=>{console.log(“Server is listening on port 5000”);})
Now before running the code paste this line in package.json file.
“start”: “nodemon server.js”,It should look like the below screenshot line 7.
Now run a command on terminal using “npm start” to execute your code. You will now be able to see “Server is listening on port 5000" on terminal console. It means that you have successfully setup our express.js app.
Now that we know that our cod
e is working as expected lets move on and create a get request by the below code.
Now type this url on your web browser “http://localhost:5000/”. You would see something like the below image.

Now open Postman. If you still have not installed it, you can install it though the following link: link
Once the installation is done open postman and send a post request on the url “htpp://localhost:5000/register” and enter username and password in body.
You will be able to receive a response back of “registered!” from backend to postman.
What is MySQL
MySQL is a relational database management system based on SQL — Structured Query Language. The application is used for a wide range of purposes, including data warehousing, e-commerce, and logging applications.
Setting up MySql
To start using Mysql you need to download XAMMP and MySql Workbench in order to proceed with this project. You can use any other service but since we are using xammp and MySql workbench it is advised to use them with us and follow along.
XAMMP Link: XAMMP
MySql Workbench: MySql Workbench
Now once you have setup xammp and mysql workbench, create a root connection using xammp and MySQL Workbench and run MySql server using XAMMP.
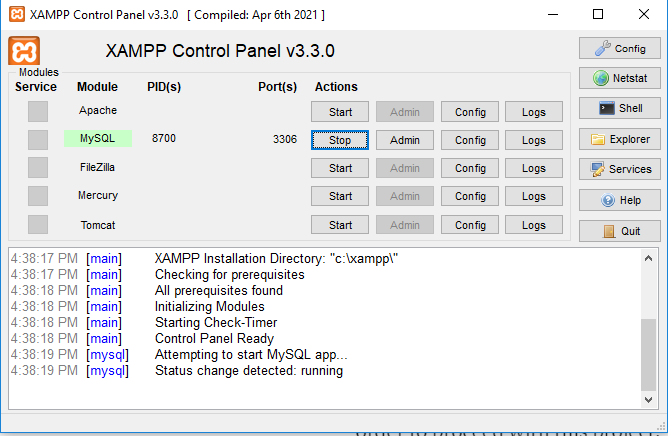
Connecting MySql to Node.js
Lets move onto our code and setup a database connection.
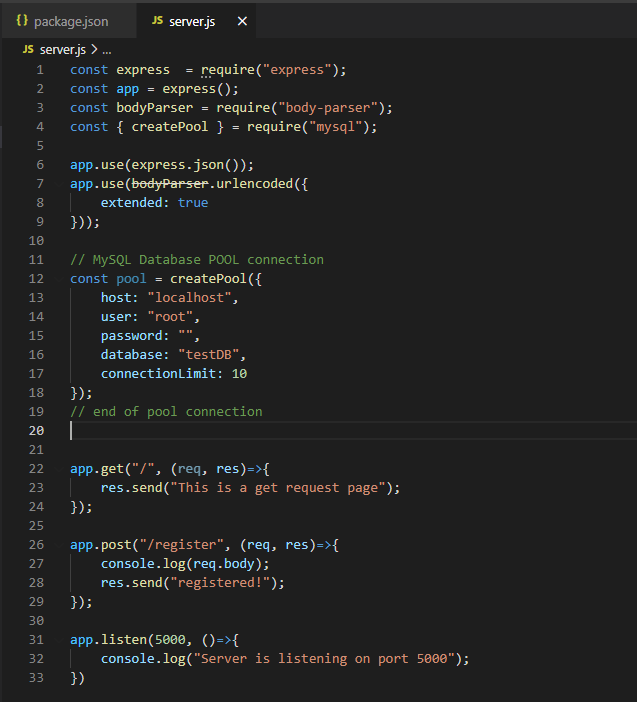
Now before proceeding, paste the following queries in MySql workbench.
create database testDB;
use testDB;
create table user(
 id int not null auto_increment,
 username varchar(250) not null,
 user_password varchar(1000) not null,
 primary key(id)
);
insert into user(username, user_password)
values(‘user’, ‘1234’)
Lets run a simple query to check whether the database connection is established successfully.

You will be able to see username as user and password as 12345. If you are seeing it, it means the connection is established successfully and we can now run queries on our website’s backend.
Registering a User
Once database is connected and everything is working fine, lets move on to connecting postman post request and mysql using a query.

Before inserting the above code in VSCode remove the query we have added earlier and add the below code into root get request.

Now go to url “http://localhost:5000/”, if you can see the password as entered it means that password is not encrypted and is insecure. To make sure our data is fully secured we will be encrypting our passwords using a npm package called bcryptjs.
What is bcryptjs
bcryptjs is a password-hashing npm package used with node.js
Now we will be saving the encrypted password in our database to make it more secure.
First initialize bcryptjs and hash the password before saving it in database.
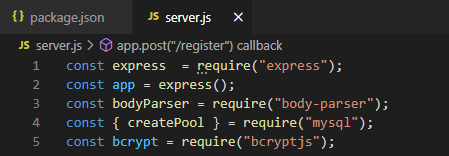
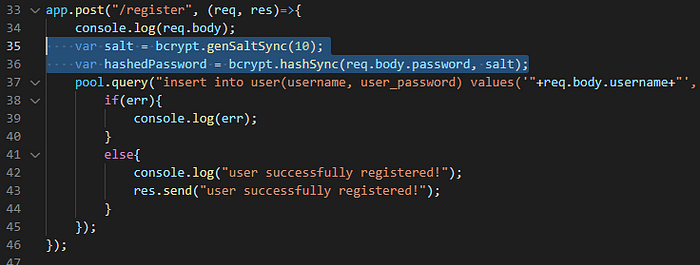
Now make a post request using postman with different credentials. Now again go to your browser root route you will now see some hashed password of the last record. It means the bcryptjs library is working as expected.
Login a User
Since we were able to register a user using bcryptjs, we will be login the user with same credentials as in database. We will be creating login post route of it.
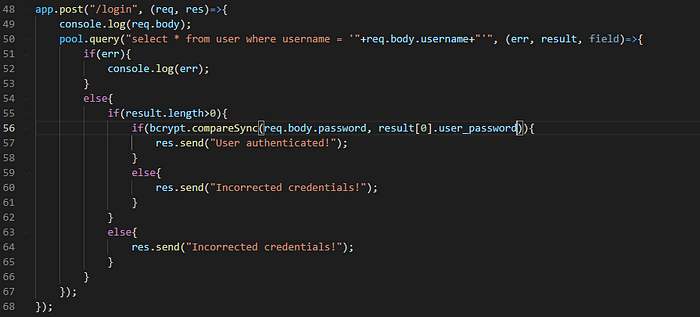
In above code we getting data from database and comparing it with user credentials. We are using bcryptjs built-in function to compare the hashed password stored in database with user input password.
After writing the code, head towards postman and post a request with both correct and incorrect credentials on url “http://localhost:5000/login”
Correct credentials output
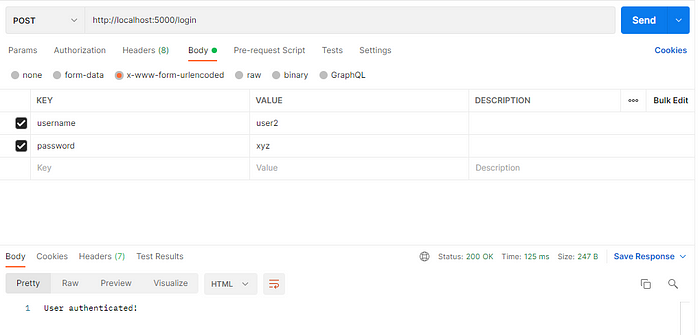
Incorrect credentials output

Using JWT
Now when our user is successfully authenticated we will be saving user data into a token using jsonwebtoken.


Here we have initialized JWT and before sending status to user through postman we are saving user’s username in token. Usually this token is send to frontend for further verification. In the next article I will be posting how we can include react.js as frontend with same authentication technique.
Now you know how to authenticated in Node.js.


Comments
Post a Comment